 This is an easy gift to make for a rockhound or fossil hunter on your list!! My son recently purchased a $15 “Rock & Gems Dig” Kit from Smithsonian. It was lame and he was highly disappointed. Our local Rock & Mineral Club was having their annual show, a month before Christmas. So, we went! I snuck around and grabbed up some cool rocks, gems, & fossils and made him a “dig block,” he can enjoy. It’s really simple and inexpensive. I already had plaster of paris & sand laying around. My only expense, for this, were the rocks. I spent about $12 on rocks, gems & fossils. They sell $2 grab bags, at the door, and I added some things I thought he’d like to that. I included rocks, gems, fossils and an arrowhead (as evidence of humans). I thought having all the different stuff would be more fun and exciting than just the rocks. I included carnivore (shark) and herbivore (bison) teeth. I also kept a couple of those out for comparison when he finds them.
 Materials for Dig Block:
Plaster of Paris / Throwaway Container for mixing / Mixing stick
Sand
Cinnamon
Shoebox Sized Container or foil pan as a mold
Objects to ‘hide’ in the block
Making the Dig Block:
For the mold, I used a small foil loaf pan. It worked great. At the end, the block slid right out of it.

Plaster / Sand Mixture
To avoid the mixture drying out, I only mixed up one layer at a time.
The recipe for one layer is:
1/2 cup plaster of paris
1/2-1 cup sand (go with your preference, it can make the mixture thicker.. start with 1/2 cup and add more for coloring and texture, but be careful about adding too much.)
1/2 cup water (you may have to add a bit more if you add more sand or plaster)
Cinnamon to color – I found some info on the web about paint or food coloring not working well with the plaster. So, rather than mess everything up.. I went with cinnamon. In the photo, our lightest colored layer contains the least amount of sand and cinnamon. The middle layer contains a bit more sand and some cinnamon. The top layer, I poured in a lot of cinnamon and did have to add a little bit more water.
 1. Pour a bottom layer. When the mixture has thickened a bit, press some of your objects into it. Wait a few more minutes to let it thicken up some more,.
2. Mix another layer of plaster/sand. Repeat step one.
Do this until you have reached the top. We added more and more cinnamon to mimic the colored layers of sedimentary rock. When you get to the top, don’t add anymore objects!
Tools to include:
– Ice Pick or wooden dowel with a pointed end: This becomes the chisel we use to dig at the rock.
– If you include loose sand, include a spoon as a small shovel.
– Small Hammer or Mallet: This is what you hit the chisel with to chip away small chunks of the rock
– Paintbrush: Include a paintbrush for brushing away sand & “rock” from the objects.
– Magnifying glass for studying close up!
-Print out of rock identification sheet
Now, for other activities.
Making Fossils!
There are a couple different kinds of fossils we can make.
Mold Fossil – a fossilized impression made in the substrate – a negative image of the organism
Take one of the single-serving snack containers and mix in it two parts plaster of paris to one part water. Wait until it gets somewhat hardened & press an object partially into the mixture. Maybe use one of the objects from your dig, or a small toy, whatever. (When I was in school, we coated the object in vaseline to help it easily remove.) When the mixture hardens, remove the object and you have a mold fossil.
Cast Fossil – formed when a mold is filled in
Take a single-serving snack container and pour sand into it. Use an object, maybe a shell, or a large shark’s tooth, toy, whatever; to make an impression in the sand. Mix two parts plaster of paris to one part water and slowly pour it on the sand impression. When it hardens, you have a cast fossil.
Trace Fossil – fossilized nests, burrows, footprints, etc.
You do this the same way as the cast fossil… but, instead of an object, use a larger container. Put sand in the bottom, then use your hand or foot to make an impression in the sand. Pour the plaster of paris mixture in the impression and you have a trace fossil of your own hand/foot! Cool for a paperweight or something.
The other kind of fossil is a True Form Fossil, which is an actual part of the animal. If your kit included shark’s teeth or something, you have a true form fossil.
INTERNET & PRINTABLE RESOURCES:
Rock Identification “Field Guide”
Scroll to the bottom for a printable guide of some popular rocks & gems.
Print this Identify Rocks Chart (the image seems to be from a now-defunct website) Click The Image for full-size viewing & printing
From Rockhounds.com, an image of the Rock Cycle
 Click Image for Fullsize viewing & printing
Use Rockhounds.com “Rock Key,” to help you identify rocks!
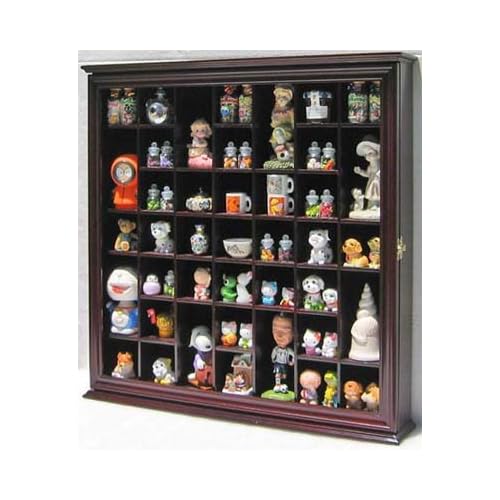
Displaying your collection!
We found a hanging curio display case, like the one below, at the thrift store and used it to display our collection.
Rock & Gem Identification Printable
ROCKIDENTIFY
Awesome! This is exactly what I needed to continue the fun for my daughter! We just got that same kit from the smithsonian (it is lame – those gems are so small! – but my daughter is 4 and loved it). Did you son find it easy to chisel this mix away?
Does the plaster mix come off the treasures? I want to do this but am worried the rocks and fossils will get wrecked…
Hello Sarah,
I can only recount my experience and that was positive, in that the plaster did not destroy the rocks and fossils. We carefully selected which items to place making sure that we either had duplicates or that the items were smooth and could be easily washed if necessary. When I was in grade school, we did a plaster of paris fossil project and first coated our items in vaseline to aide in protecting them from the paster. Hope these tips help you with your decision.
Thanks for posting this! My son found this kit on clearance and used most of his money to buy it. I scoffed at first, but this thing has kept him busy for HOURS. The gems were a LOT smaller than the packaging leads you be believe, but he didn’t seem to care. He is only 5 though, so I can image that an 8+ year old would find the small gems more disappointing.
Anyhow, I thought this would be a great thing for the kids at my sons school to do when they are stuck inside at recess on cold days. It looked like something that could be easily made, so I did a web search and found this page.
I originally tried 1 part of each water, sand and plaster, but it seemed too chalky to easily chisel through. It will still work for the older kids, but it is a lot of work to break through it.
I tried another batch with 1 part water and plaster and 3 parts sand that I think worked a lot better. It looks more realistic and it is easier to chisel apart.
I actually found some dinosaur bone models at the dollar tree. I used an iphone box that I lined with tin foil and it worked really well. The creases in the foil made it look really neat too. This was the first one I did with the equal parts, so we will see how the kids do with it.
I also found some clear red plastic hearts that kind of look like gems that thought the younger kids would enjoy digging for. I put those in a foil lined muffin tin with the 3 parts sand to 1 part water and 1 part plaster.
I may try one with actual money in it at some point too.
I recreated the mallet and chisel in the kit with a 2in slice of a 1 1/8 dowel with a hole drilled in it and a 6.5inch slice of 3/8 dowel glued into the hole. I used a 5 1/4 inch slice of 3/8 dowel that I sharpened in our pencil sharpener for the chisel.
As for the previous question, both mixes that I did have not damaged the plastic dollar store items that I used, so I have to imagine that they wouldn’t damage a harder substance.
Wow! Glad you found the article useful and shared some of your tips with us. 🙂 These are a fun and handy thing to have around.
This looks like such a great project! I want to make them for my kids at school. Do you think I could make this a few weeks ahead of time?
Sure. You might want to experiment with small amounts of the recipe and find the best combinations to create an easy-to-chip block. I found that the boys would prefer the blocks to be a little easier to chip away.